测试环境:Win10 + VMware® Workstation 16 Pro
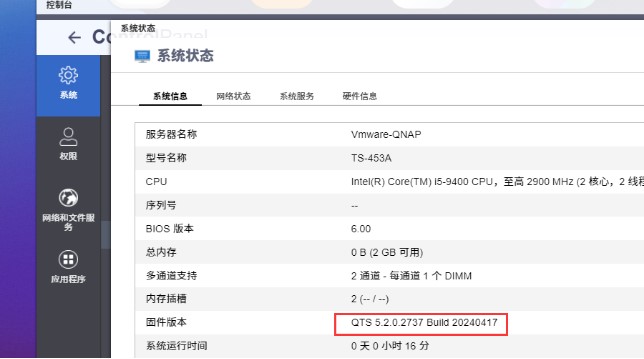
测试版本:qnap 5.0 ,可web后台升级到最新版
所需软件:Ox_install_UEFI_BIOS.iso 和 xshell/xftp
附件下载:
腾讯微云:https://share.weiyun.com/N88zAcRA 密码:pp5b4w
百度网盘: https://pan.baidu.com/s/1sKufTNKQl0OtVWNv0R8htQ 提取码: xuzw
谷歌网盘:https://drive.google.com/drive/folders/1McKF-Hme2TI1Ca5CCAtGnzZ31lAMY_lw一、创建虚拟机(很简单)
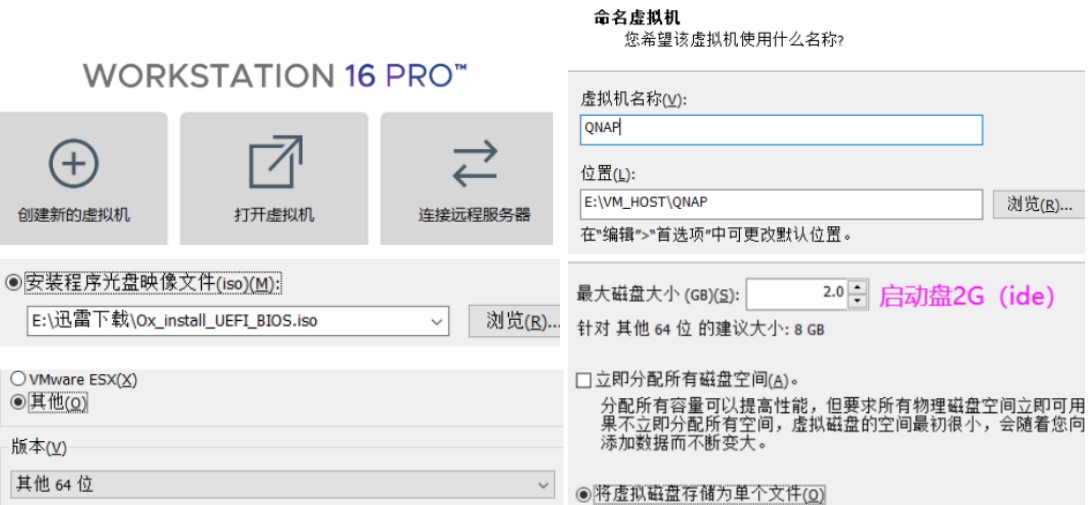
1、创建虚拟机配置
创建新虚拟机(自定义)/硬件兼容性(默认)/选择IOS镜像(Ox_install_UEFI_BIOS.iso)/其它(其它64位)/虚拟机名称和位置/内存、CPU(看着分配)/网络连接(使用桥接网络)/IO控制器(默认)/磁盘类型(IDE)2G
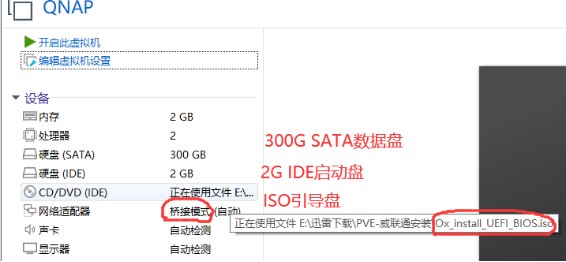
2、创建数据盘
编辑虚拟机,分配一块300G(SATA)数据盘,尽量大于200G,最终配置如下:
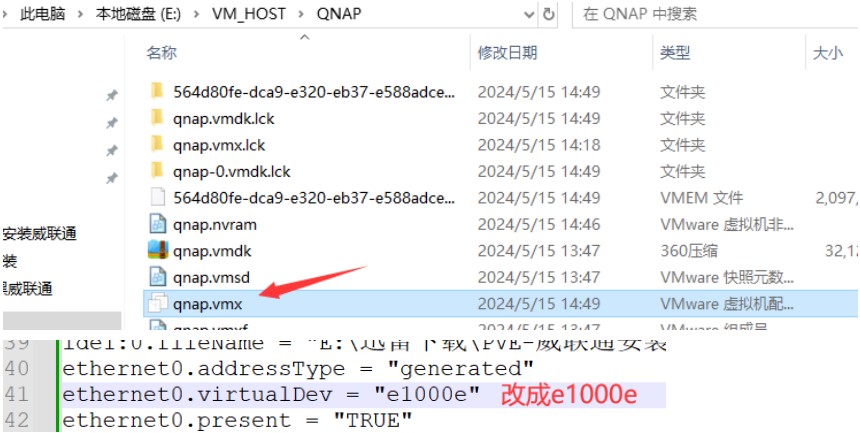
3、修改网卡
打开虚拟机目录下的 .vmx文件,搜索 e1000 ,然后改成e1000e
二、编写model.conf(难,请仔细)
下载附件中的model.conf,对比一下你的pci数值,对网卡、ide、sata部分做修改。
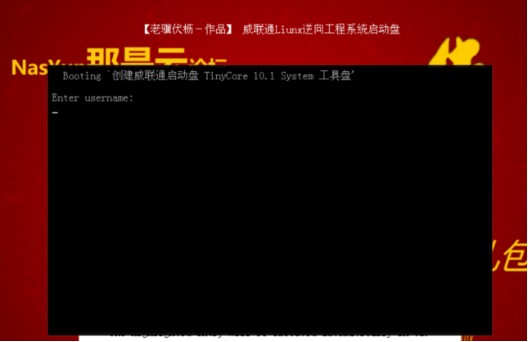
1、启动虚拟机,等待tiny系统自动启动,账号密码都是admin
2、查看IP,输入ifconfig
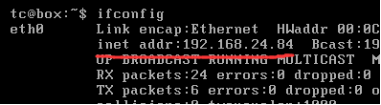
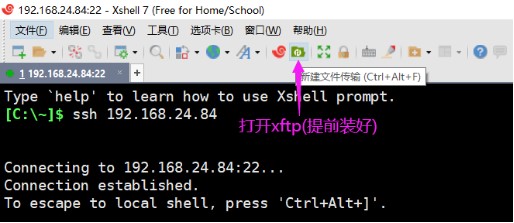
3、使用xshell登录, 账号tc 密码admin
ssh 192.168.24.84
4、修改model.conf文件
备注:关于数值转换以及model.conf如何写,具体参照下面帖子,就不细讲了。
(需要把查询到的数值都转换成16进制,16进制的1~9和10进制相同,就不用转换了)
https://blog.hx99.net/Tech/2015.html
https://blog.hx99.net/Tech/2079.html
https://zhuanlan.zhihu.com/p/663779657第1步,找启动盘的信息
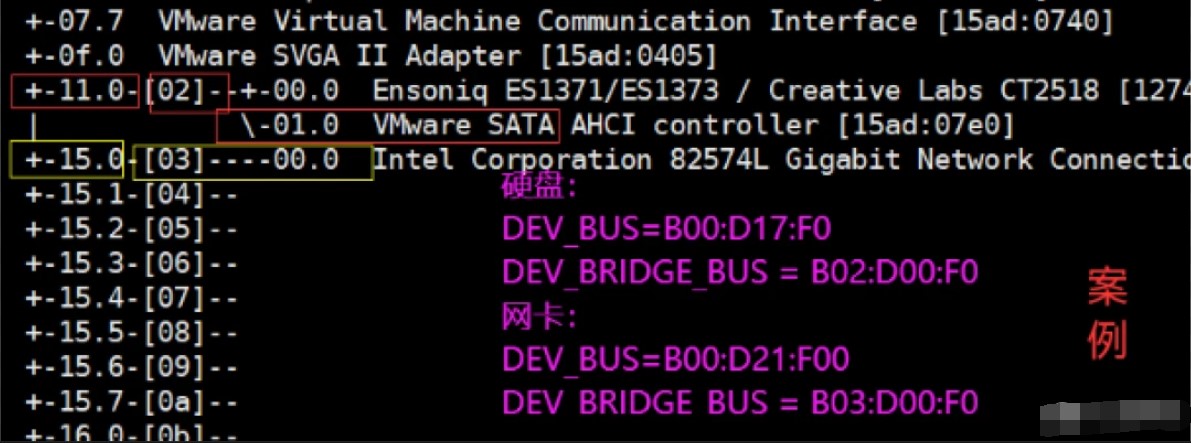
输入 lspci -tvnn 命令,查看PCI设备并记录

[Boot Disk 1]
DISK_DRV_TYPE = ATA
DEV_BUS = B00:D07:F1
DEV_PORT = 0
第2步,找网卡信息
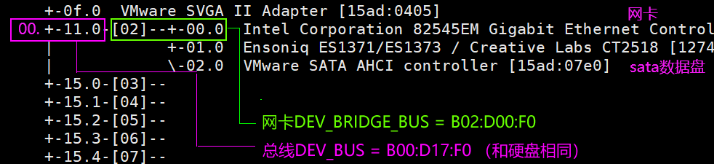
[System Network 1]
DEV_BUS=B00:D17:F0    #总线地址和硬盘相同(十六进制11 → 十进制17,小于等于9不用转换)
DEV_PORT = 0
DEV_BRIDGE_BUS = B02:D00:F0   #子地址
第3步,找数据盘的信息

[System Disk 1]   #添加1~4块硬盘,看自己情况
DEV_BUS=B00:D17:F0
DEV_PORT = 0   #从0开始
DEV_BRIDGE_BUS = B02:D02:F0

[System Disk 2]
DEV_BUS=B00:D17:F0
DEV_PORT = 1
DEV_BRIDGE_BUS = B02:D02:F0

[System Disk 3]
DEV_BUS=B00:D17:F0
DEV_PORT = 2
DEV_BRIDGE_BUS = B02:D02:F0

[System Disk 4]
DEV_BUS=B00:D17:F0
DEV_PORT = 3
DEV_BRIDGE_BUS = B02:D02:F0
再来一张参考案例:
三、制作系统启动盘(有点难,要仔细)
1、下载固件
(建议使用5.0.1, 5.1也行, 反正web后台可升级)
https://www.qnap.com.cn/zh-cn/download?model=ts-453a&category=firmware
https://download.qnap.com.cn/Storage/TS-X53II/TS-X53A_20230906-5.0.1.2514.zip2、上传固件
打开xftp,将TS-X53A_20230906-5.0.1.2514.zip包传到/home/tc目录下
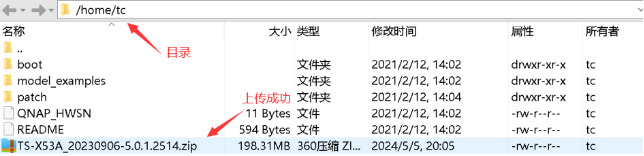
3、解压固件
get_qnap_firmware /home/tc/*.zip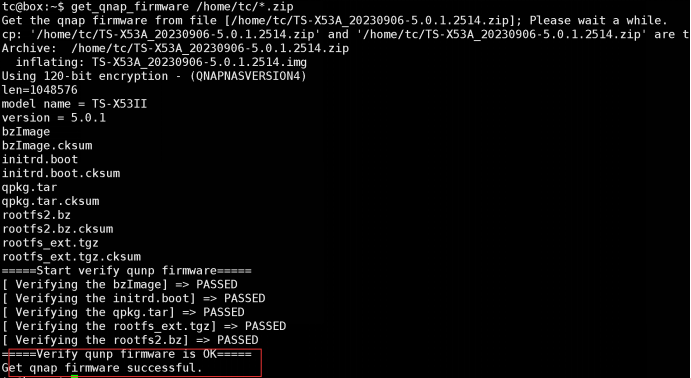
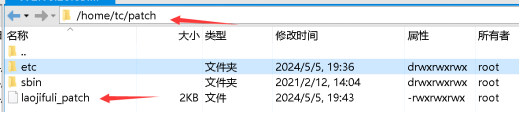
4、上传model.conf
第1步,先修改一下写入权限,不然有可能失败

sudo chmod 777 /home/tc/patch/ -R第2步,将刚才修改好的文件,上传到/home/tc/patch/etc/目录

第3步,修改/home/tc/patch/laojifuli.patch,这里直接上传覆盖
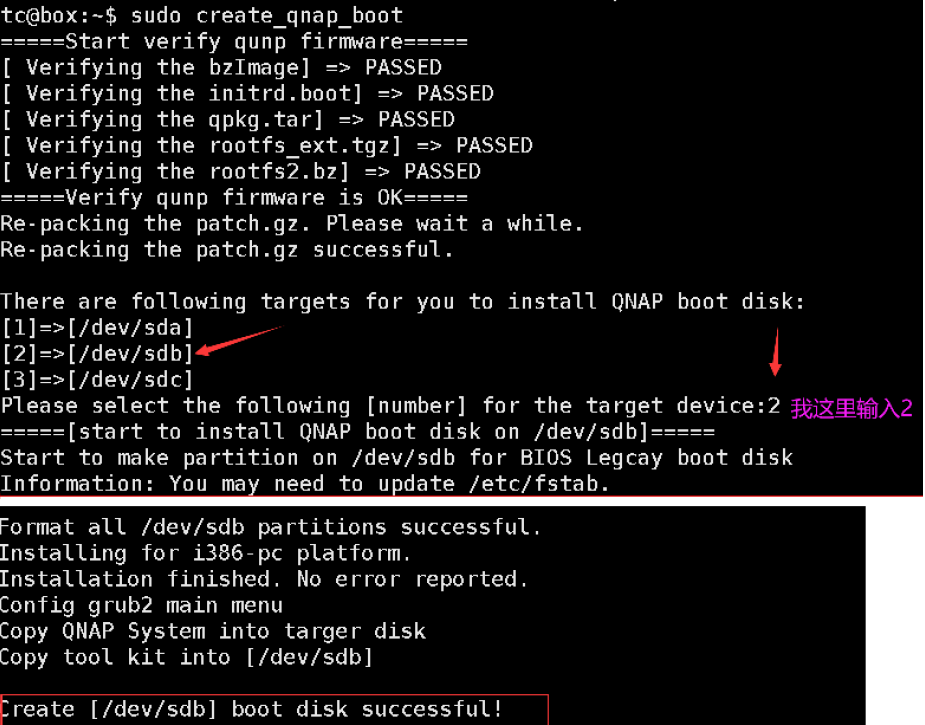
5、制作黑威启动盘
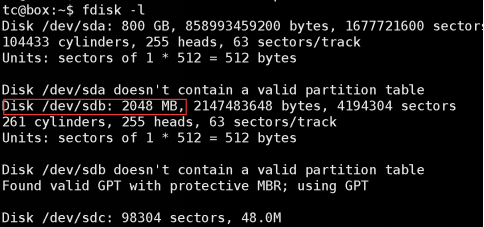
第1步,先看一下启动盘的盘符,fdisk -l ,找2G的那个,我这里是/dev/sdb
第2步,输入制作启动盘命令
sudo create_qnap_boot
如下图,选择/dev/sdb,键入2即可,然后直到成功
四、安装黑威联通系统(不难,即将成功)
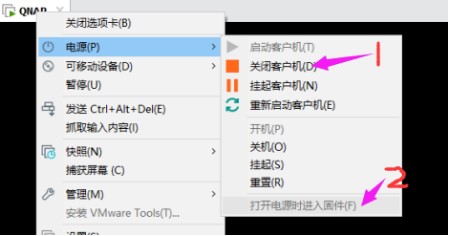
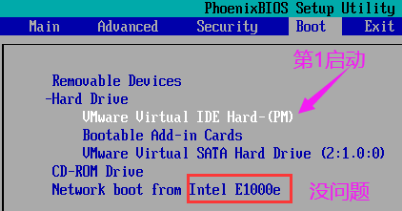
1、设置bios启动项
回到vmware,关闭虚拟机,进入虚拟bios,将2g ide 盘改为优先
使用 + – 号调整光驱、ide 盘顺序,f10 保存。
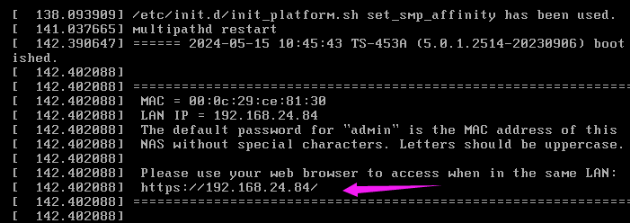
2、启动虚拟机
保持默认

几分钟后,出现IP地址,说明启动成功(至少启动盘、网卡信息无误)
3、安装固件
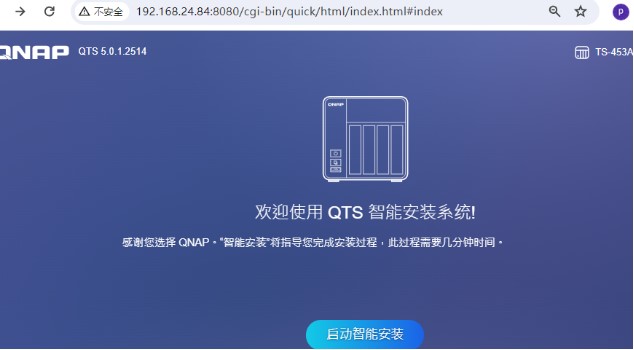
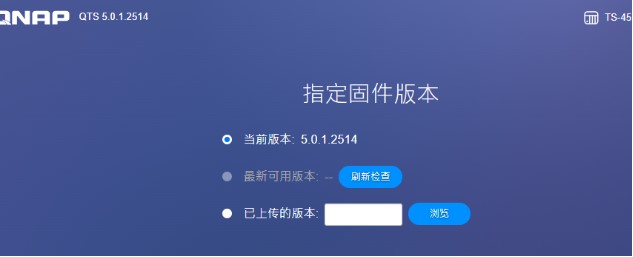
一路升级,到最新版本
五、其它问题
1、找不到硬盘的问题
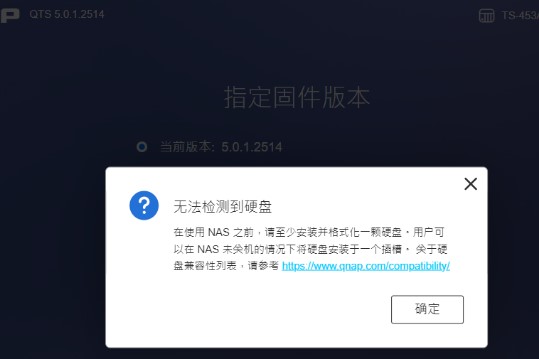
说明model.conf中数据盘信息有误,解决办法(从<二>开始重做一遍):
第1步,关闭虚拟机,删除2g ide启动盘,重新添加1次;
第2步,开机进入bios,设置光驱启动,进入TinyCore自举系统,重新修改信息,然后再安装固件。
2、卡屏、没动静
是否已将虚拟网卡类型修改为e1000e;
Model.conf 是否有严重错误;
其它未知问题,彻底删除虚拟机,重装一遍